Using Firebase with macOS


created in December 2020, while running macOS Catalina v10.15.7

1. First, let’s check to see if you have a version of Node.js already installed.

Terminal

Using Spotlight search Cmd + Space, search for & open Terminal.

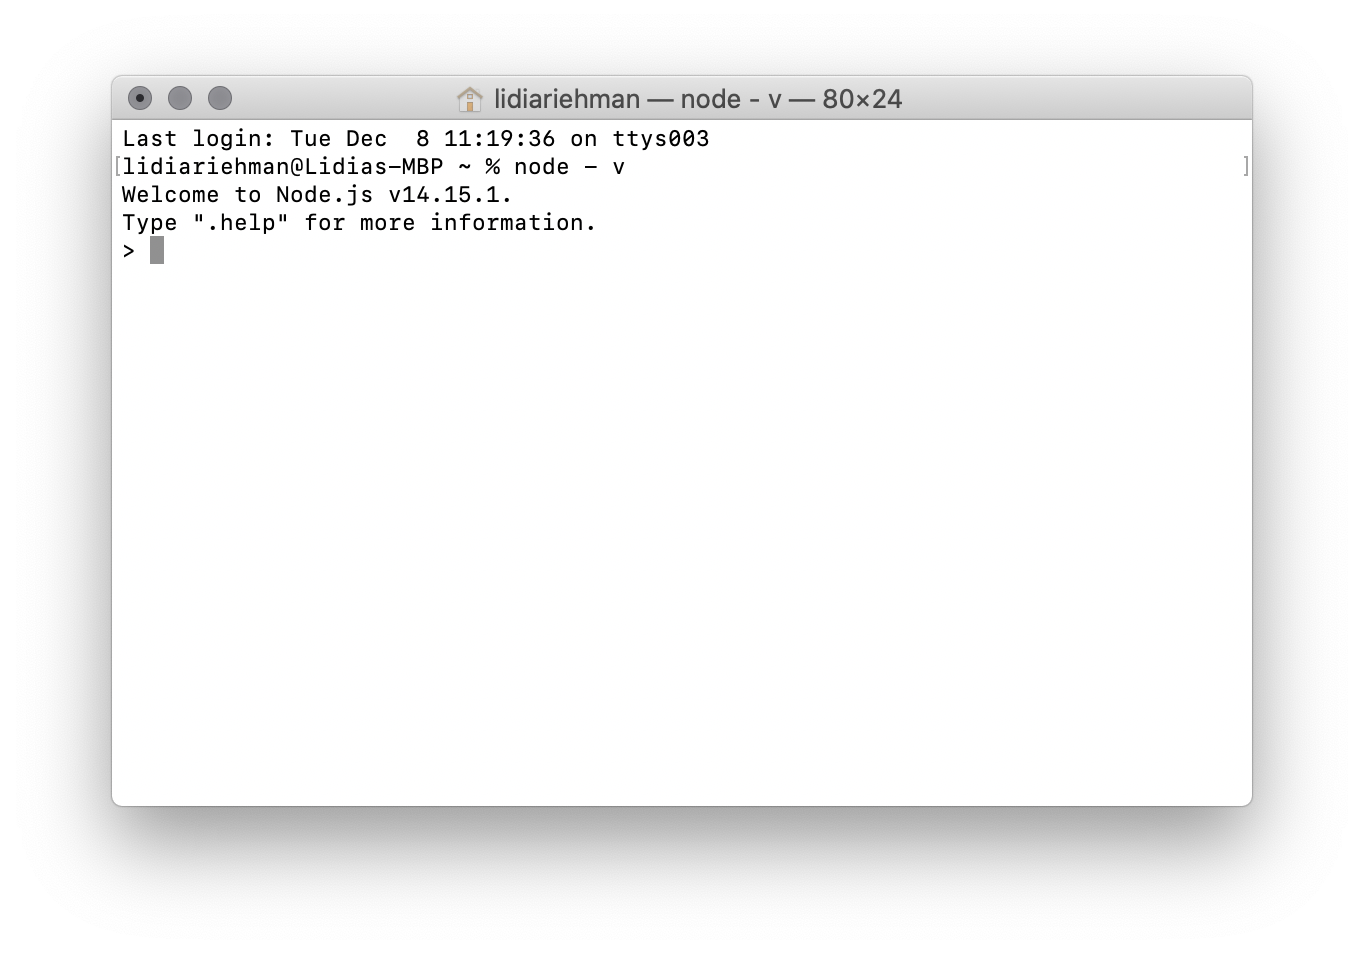
Enter node - v in the terminal and press Enter.

If you get a message like this:

lidiariehman@Lidias-MBP ~ % node - v
Welcome to Node.js v14.15.1.
Then you already have Node.js installed.

Update to the latest version using: npm i -g npm
If you get checkPermissions warnings, run the command: sudo npm i -g npm
When you see Password: type in the password you use to login to your computer. It will not show on the terminal as you type. Press enter after typing, and if the password is valid, the installation will start.

When you have the latest version installed, move on to the next step.

If you get a message like this:

-bash: node: command not found.
Then you do need to install:

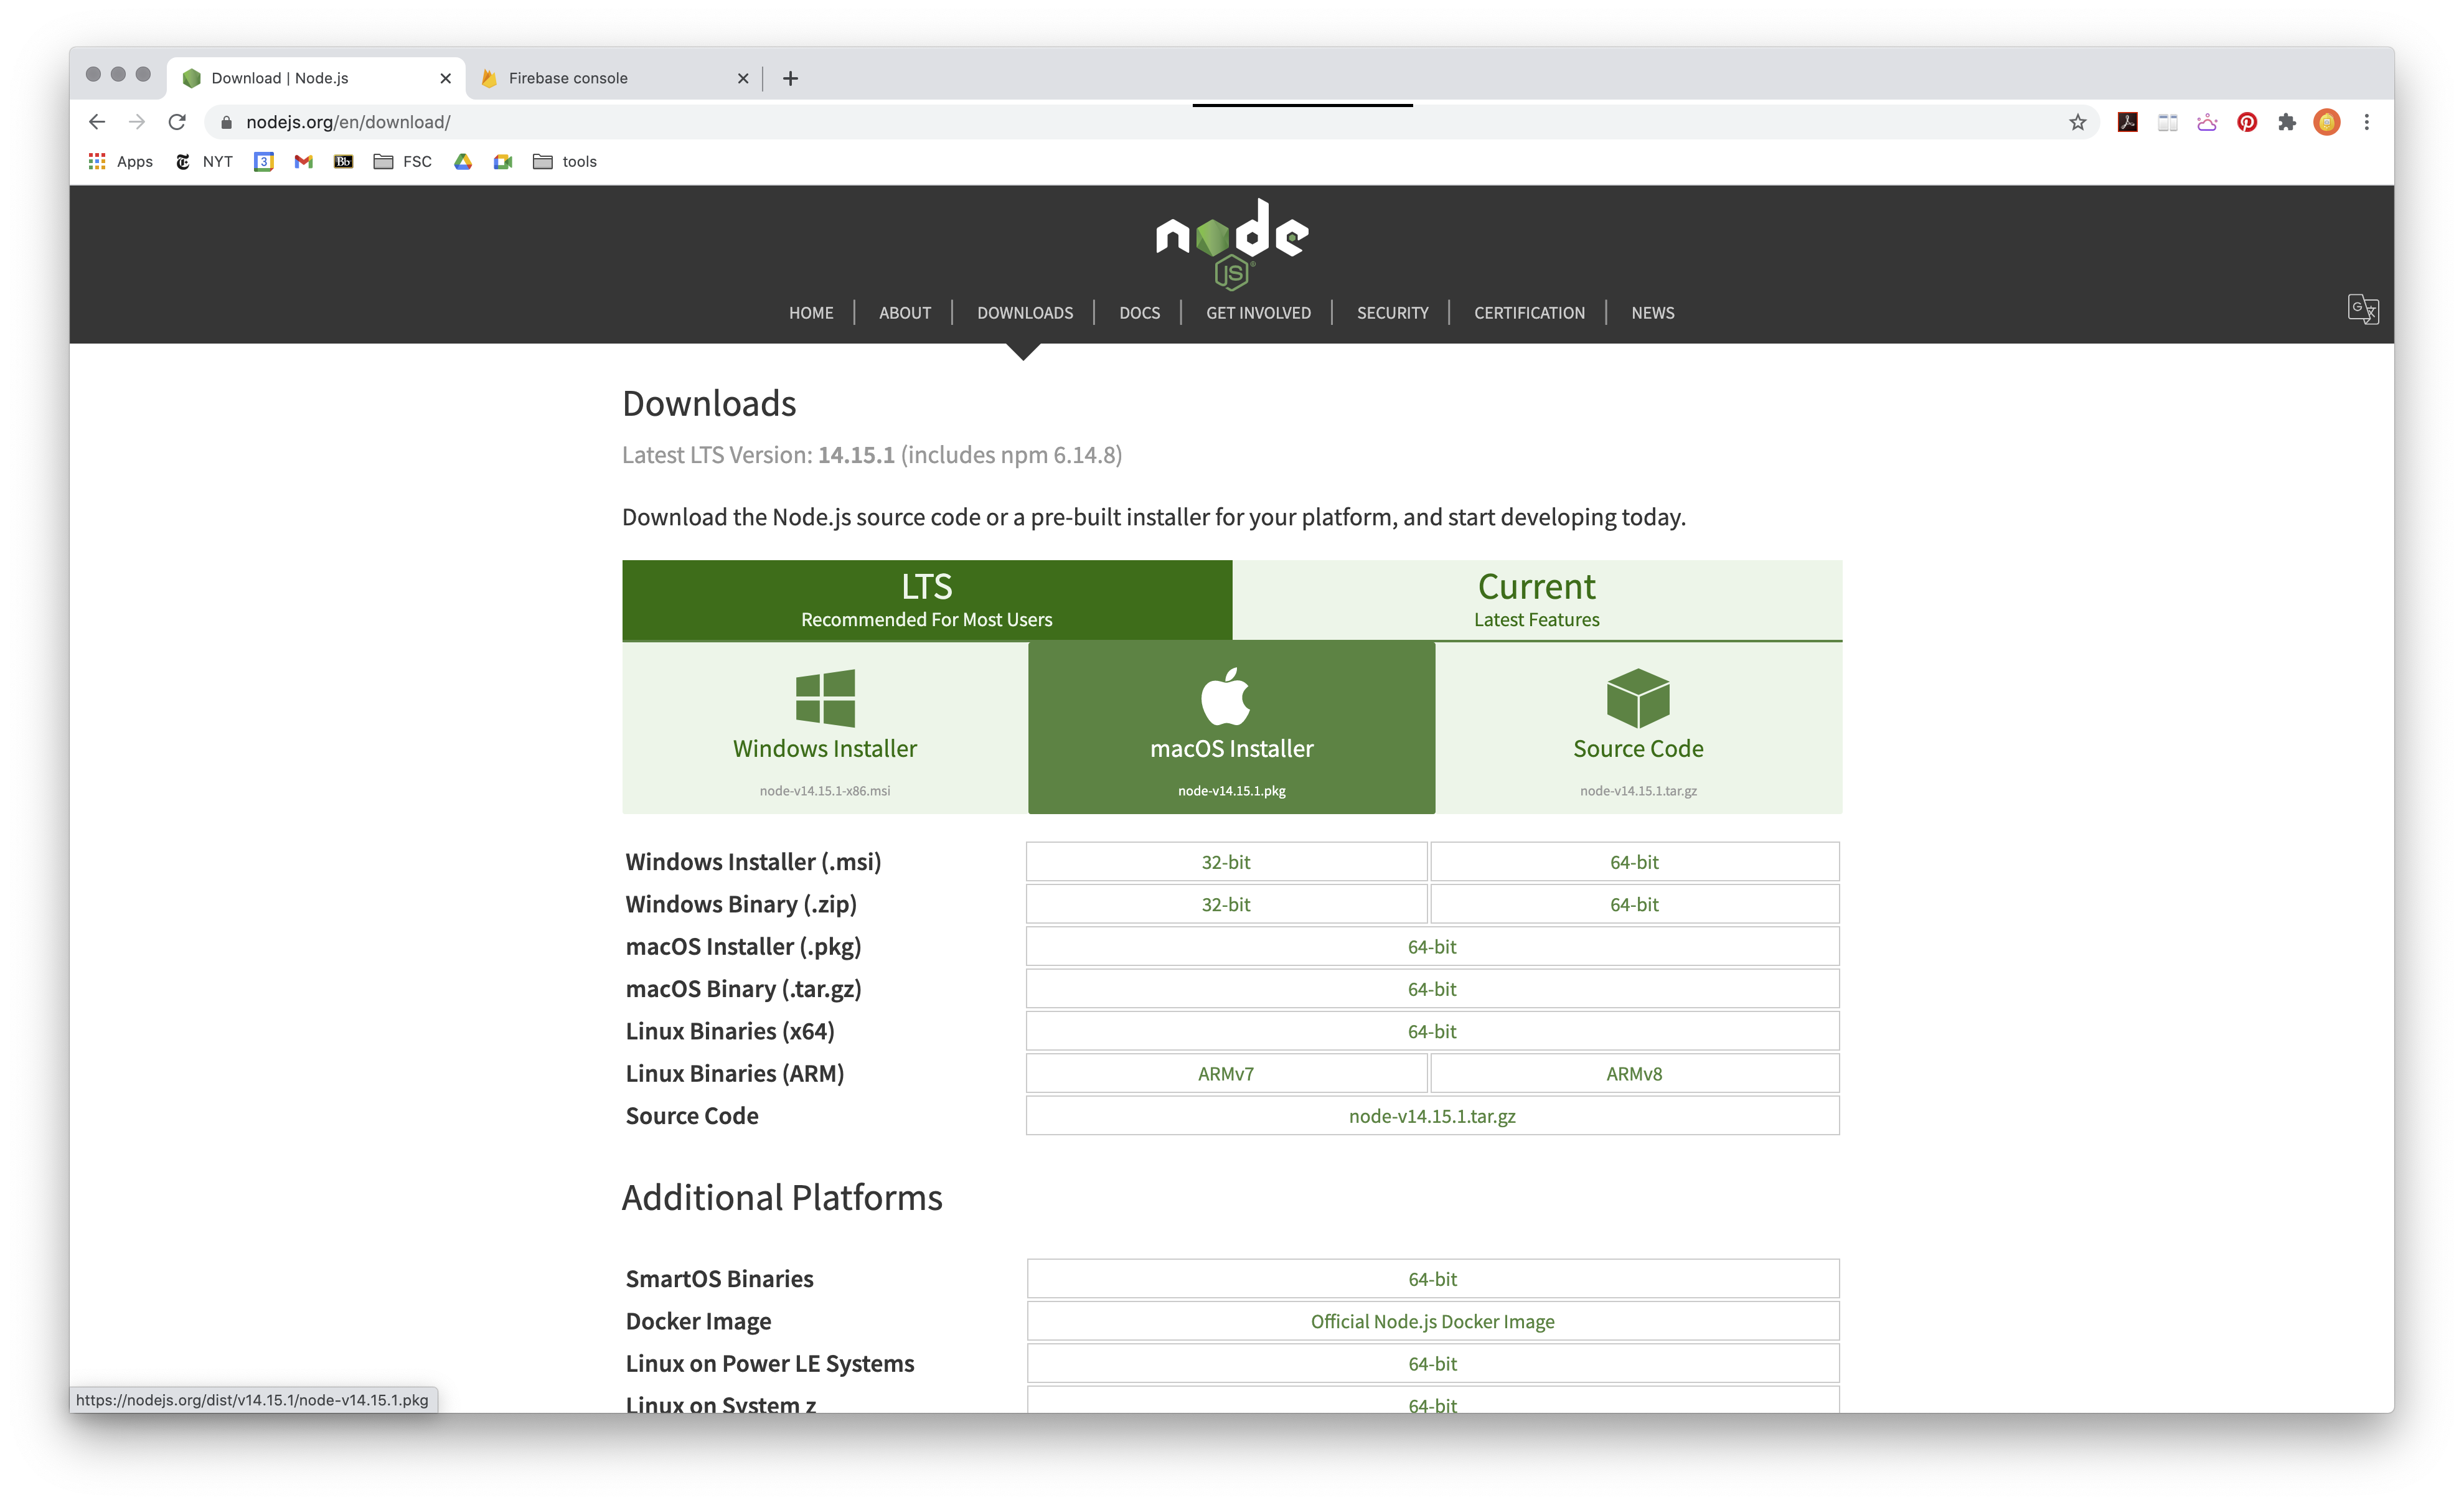
  • Go to nodejs.org & you'll see a download link for MacOS.
  • nodejs.org

  • When the file finishes downloading, locate it in Finder and double-click on it.
  • Follow the entire installation process.
  • When installation is finished, open the Terminal again.
  • Enter node - v in the Terminal to verify that Node.js is installed correctly.

Did you get this message?

lidiariehman@Lidias-MBP ~ % node - v
Welcome to Node.js v14.15.1.
If a version was output, then you’re good!


2. Sign up for Firebase if you haven’t already.

https://console.firebase.google.com/

Log in using a personal gmail account.

Please note, you cannot complete sign up using your FSC email address!

Choose create a project & follow the steps.


3. Great! Now, let’s add the Firebase SDK to your website.

Note: I am using Visual Studio Code, but the process will be the same in any text editor.

  • When you click on your project, you will see a left-hand menu with a gear icon.
  • Click on Project Settings.
  • Scroll down to the Firebase SDK snippet. Copy the provided code, and paste it into your index.html document, just before your closing tag.
  • Save your document.


4. Install Firebase.

Here, I have opened Terminal in VS code by pressing Ctrl + ~
Type the following commands in the Terminal:

sudo npm install -g firebase-tools
press Enter

Type your computer password and press Enter

The installation will begin, and you will see the version output when it is finished.

firebase login
press Enter

Login using the same gmail account you created your project with.

My account was already logged in, so my account email was output in the terminal.

firebase init
press Enter

This initializes Firebase in the current directory (folder) that you are working in!

Now we must answer some questions:

  • Use the arrow keys to scroll down to Hosting: Configure and deploy Firebase Hosting sites
  • press Space to select, then Enter
  • Scroll to Use an existing project , press Enter
  • Scroll to your project name, press Enter
  • For the rest of the questions, let’s use these answers for now:

  • press Enter
  • type N, press Enter
  • type N, press Enter
  • Output: Firebase initialization complete!
  • Type firebase deploy, press Enter
  • Output: Deploy complete!
Terminal will also output your project console URL and hosting URL. Visit the hositng URL to confirm that setup is complete!


5. Add files to the hosted site.

In your root folder, there there is a new folder titled "public", open it up
Inside there is a default index.html document, created for you by Firebase. You can throw that in the trash and replace it with the index.html file you created.

Any HTML pages, .js files, stylesheets, images, etc. that you want to show on your website must be moved into the public folder.

Whenever you make changes to any file in the public folder, you must type firebase deploy into the terminal to update the live website. The terminal will confirm that the update was successful!

Congrats!
You did it! That wasn't too bad, was it?